|

|
|
ACS/ABC Inventory Software - Useful Tips
Did you know that you could use your Almyta to sell the frozen chicken?
In fact, it is not about chicken.
This short article will show how to configure your Almyta to buy product in cases and sell by weight.
If you used this software for some time, you have probably found by now that there are multiple units of measure (UOM) available and that the Base UOM is our stocking unit, the Purchase Order UOM is a buying unit, and the Sales Order UOM is a selling unit.
Let us create an item which we will buy in cases and sell by kilos. Please note that we selected Kg for UOM, Carton for the package, and put 102 (Kg) into the Units per Pack field. This is 102, but not 100, because the values are not precise the model that we are building. 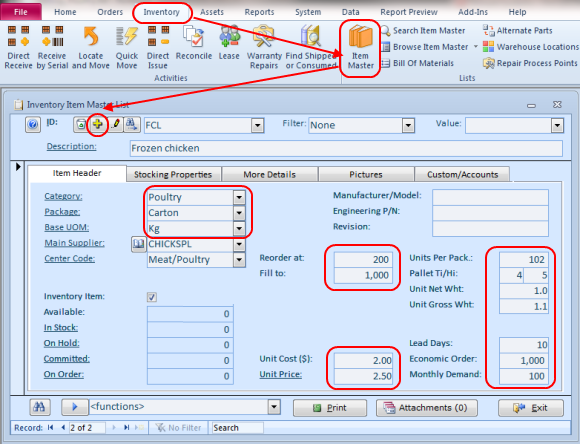 Let us assume that our chicken comes in 100 kilo cartons. The weight can vary from carton to carton, but on average it is about that. Double-click the Base UOM. The Unit of Measure screen appears. Add a row with values UOM=Kg, Contains=1, Of Unit=Kg. Also, add another row with values UOM=100kg ctn, Contains=100, Of Unit=Kg.This one we will be using at purchasing. 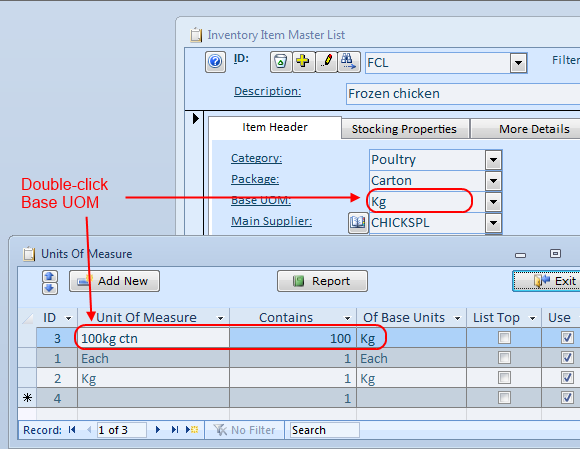 Let us now create a new purchase order. Go to the Orders menu, Purchasing group, Order Detail item. 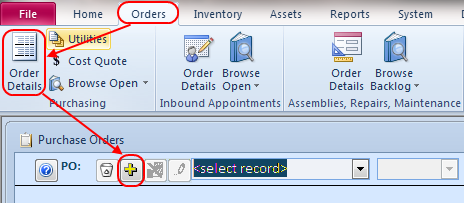 Fill out all necessary fields on the Purchase Order screen, Order Header tab. 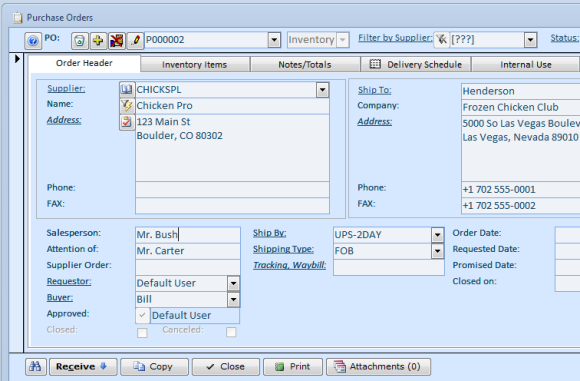 Select the FCL in the item list, select 100kg ctn in the PO UOM, input 5 (cartons) in the PO UOM.  Check how the printed purchase order looks like. To do this, click the Print button at the screen bottom and then double-click Current Purchase Order at the top of the list. 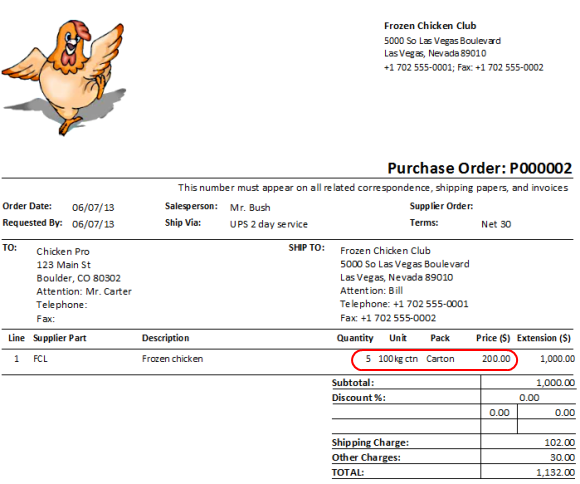 Use the Close Print Preview button at the top-right to close the preview screen. 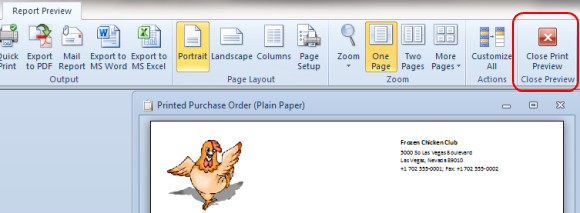 Let us now receive the product against our purchase order. Pull up the Purchase Order screen, find the order in the top-left list, and click the Receive button at the bottom-left. The Receiving screen will appear. The screen will be pre-populated with the values taken from our purchase order. Change the values on the receiving screen to the actual ones. Weigh the product or take the weight form shipping documents, input lot numbers, expiration and production dates, specify warehouse location if I is known at this time. Finally, click the Receive button on the top-right of the screen to record the receiving transaction. 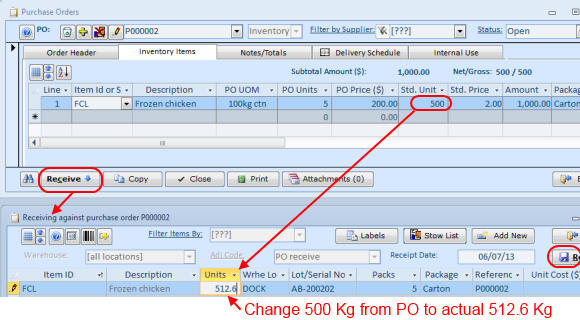 If you ever need to quickly find out what was received against any particular purchase order and add more information to the received units or move them around in the warehouse, use the Inventory/Locate and Move screen, select the purchase order in the receiving reference list, and click the View button. 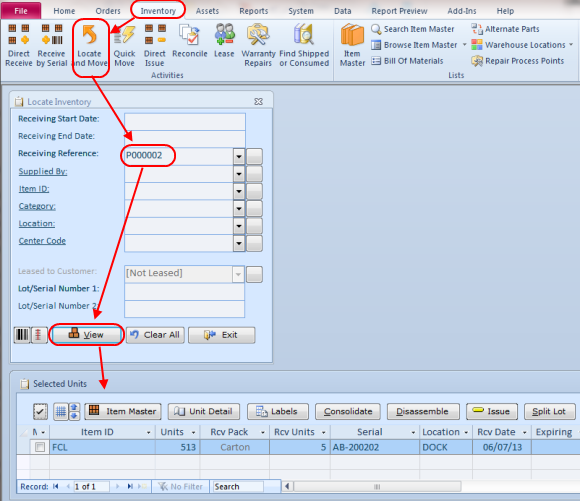 Let us now sell 100 kilos of chicken. Create a shipping order, select FCL in the line items tab, input 100 in the units. Our selling units match or stocking units (Base UOM), but it is easy to configure the shipping order screen, similar to the purchase orders screen, to sell in pounds instead of kilos. Click the Issue button, double-click the Wrhe Location cell, and double-click the stock. 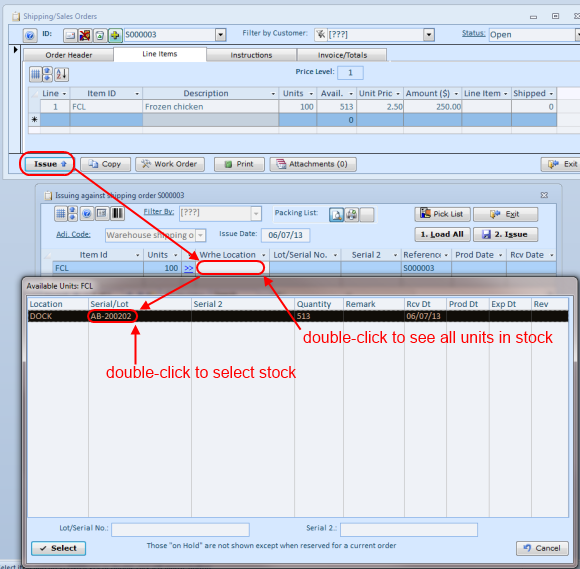 Finally click the Issue button (top-right) to record the transaction. 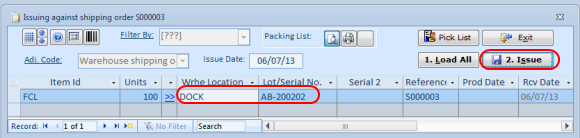 The Packing List will appear in a print preview screen. 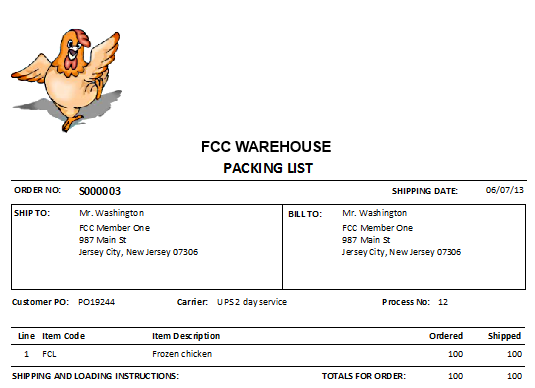 If you need to print an invoice, click the print button at the bottom of the shipping order screen. Double-click the Invoice in the list. 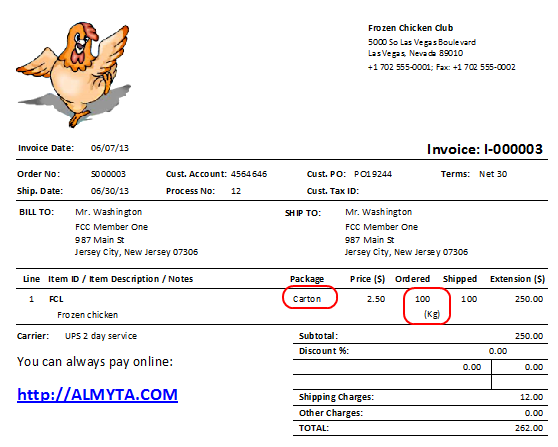 Let us see what is left in stock. Use locate and Move, select the item, click the View button. 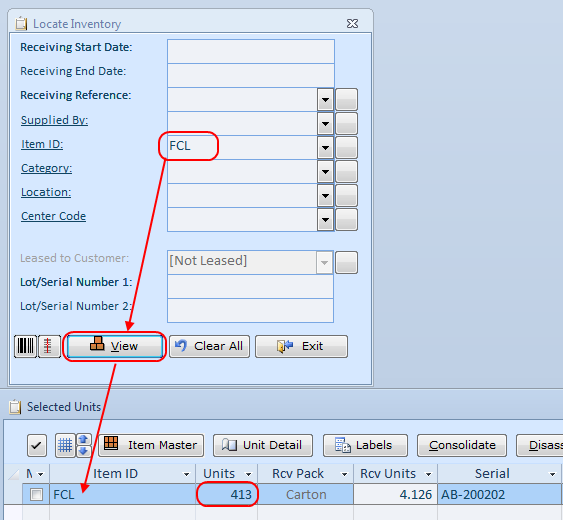 At the end, let us show you a few useful shortcuts for pulling up transaction history. At the end, let us show you a few useful shortcuts for pulling up transaction history. Open the Item Master screen and load an item record. To see receiving history, select Positive Adjustment History at the screen bottom. The Browser screen will open with history of all positive transactions for the item. 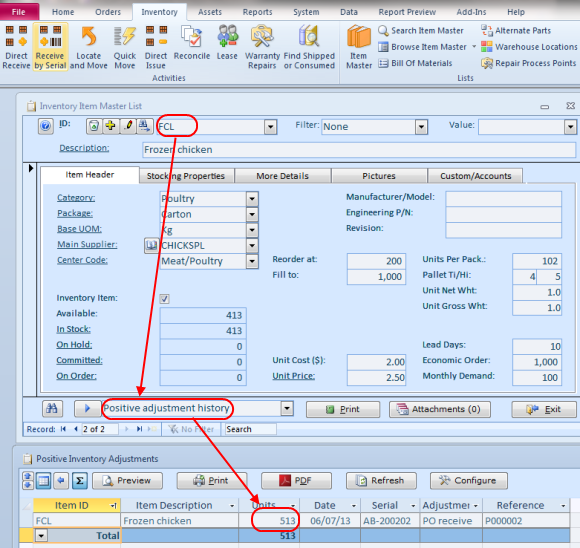 To see shipping history, select Negative Adjustment History at the screen bottom. The Browser screen will open with history of all negative transactions for the item. 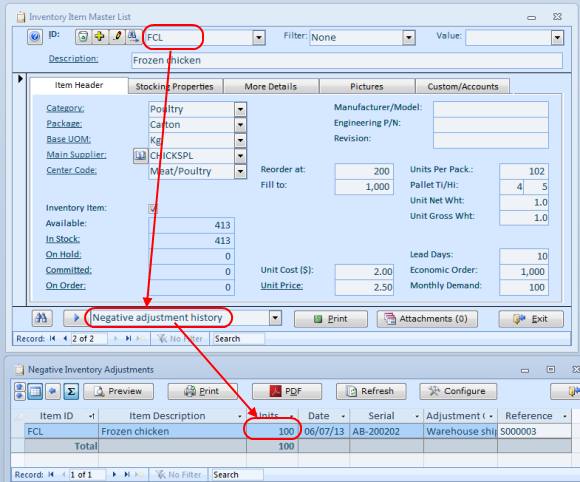 To see shipping history, select Negative Adjustment History at the screen bottom. The Browser screen will open with history of all negative transactions for the item. 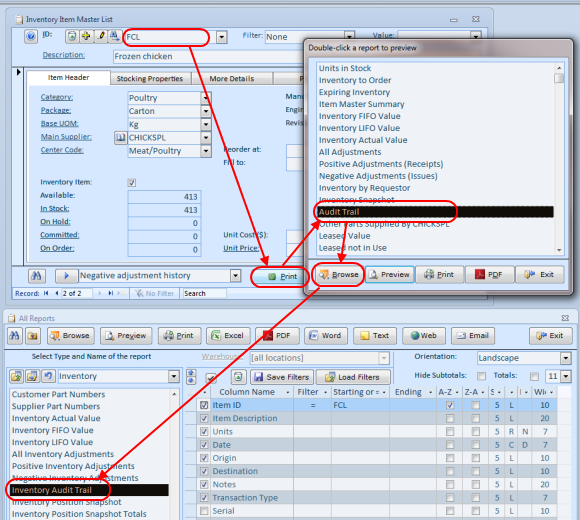 To see all transactions for an item including, movements in the warehouse, click the Print button, double-click Audit Trail. On the next screen, add filters by date if needed and double-click the Audit Trail. The Browser screen will appear showing all transactions for the item.  More tips: Configuring Datasheets, Changing Skin Color, Currency Rates Lookup, External Links, Serial Number Tracking, Bulk-Moving Inventory, Multi-Level Price Table, Line Items Columns, Selling Poultry, Supplier Catalog, Finding Items in the Lists, Warehouse Stock Transfers, Returning Shipped or Consumed Inventory. |

|
| Buy Now
| Help
| Software License
| Privacy Policy
| Free Software
|
| Inventory Software Module | Why Almyta Inventory Software? | Inventory Software Lessons: | 0 | 1 | 2 | 3 | 4 | 5 | 6 | |
© almyta systems 2003 - 2025