Did you know that you could transfer inventory between warehouses?
In our example, we are going to move a few units from one warehouse to another.
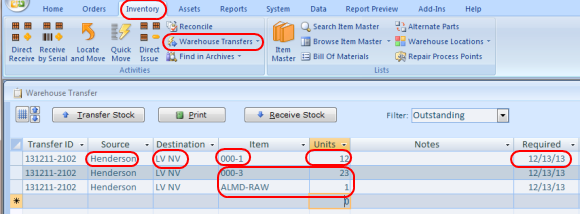
Go to the Inventory, Warehouse Transfers menu. Start filling the screen.
For the first row, Source Warehouse, Destination, Item Units, and the Required Date.
To continue adding the transfer, fill only Item and Units columns.
The rest will be filled automatically per the first row, until you decide to change it.
To start a new transfer, close the screen and return back or change the Transfer ID number and continue.
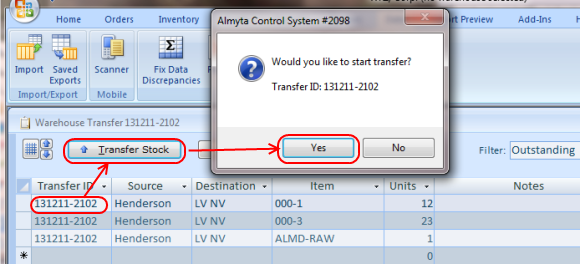
When you are ready to transfer inventory, return to this screen, click on any row with the transfer ID, that you are working on, and click the Transfer Stock button.
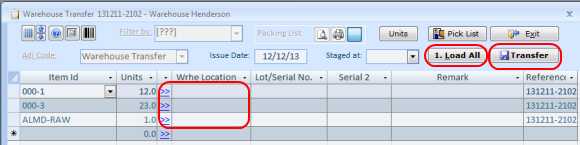
The Warehouse Transfer screen will open. Pick inventory units one by one or use Load All button, use the Pick List button if needed, and finally click the Transfer button.
All inventory units will be placed in the destination warehouse, in the transfer ID location.
To place moved inventory in its actual warehouse locations, go to the Inventory/Warehouse Transfer/Receive menu
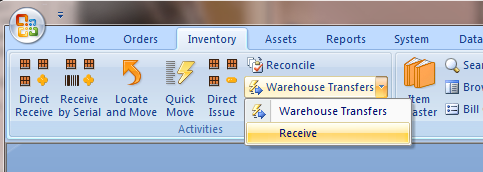
or find a particular transfer ID on the warehouse Transfer screen, and click the Receive Stock Button. Use checkbox on the left to select rows then click the Move button to bulk-move the units.
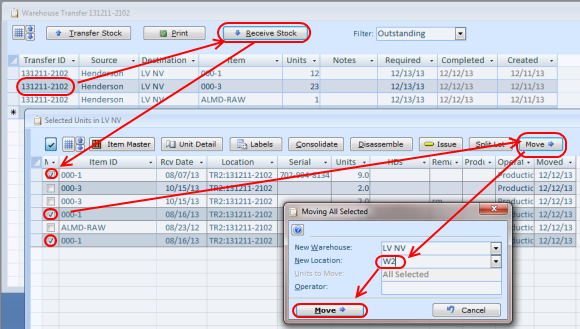
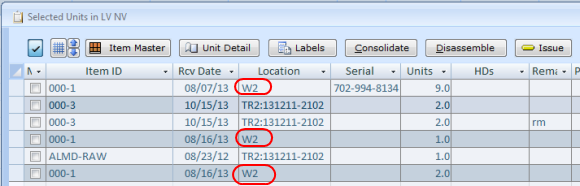
All units will be moved. Continue until all inventory units get stocked.
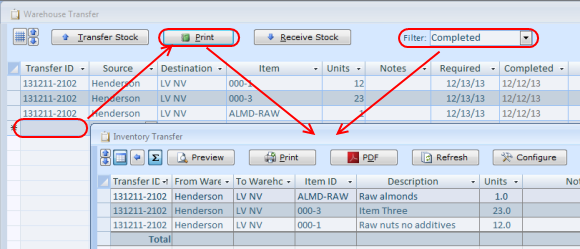
Using Warehouse Transfer screen, you can run a report with various filters. To see all records shown on screen, go down to a new record and click on it then click the Report button. To see a report for a single transfer ID, click on any row with that transfer and then use the Report button.
Almyta Systems
+1-202-930-0266
info@almyta.com
info@almyta.com
59 Damonte Ranch Pkwy, Ste B-459
Reno, NV 89521
The United States
Reno, NV 89521
The United States
Transferring inventory between warehouses