Almyta Control System Advanced Reference
Contents
Almyta
Control System Advanced Reference
Sharing
Your Local Company with Other Users. Networked Installation.
Connecting
to a Shared Company
Finding
the Data File’s Location
Substituting
Standard Forms with Custom Add-ins
Renaming,
Hiding, Showing fields on the Form-Like screens
Changing
column names on the spreadsheet like screens
Changing
column names on the browse screens and reports
Translating,
hiding, and editing menus
Software Maintenance
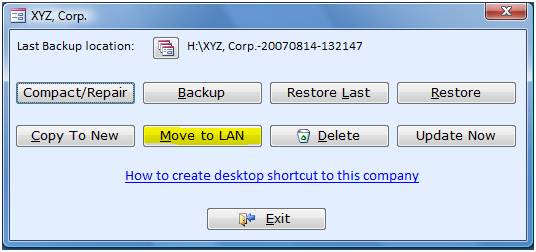
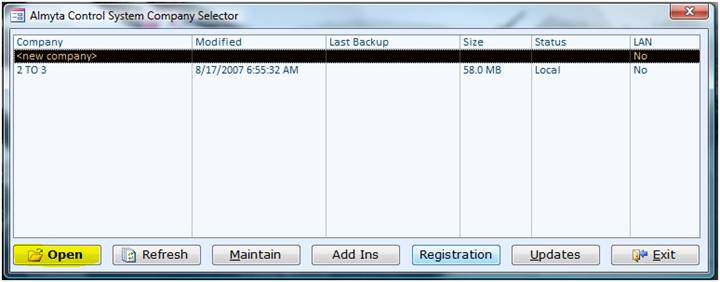
In Almyta Control Company Selector, highlight a company you wish to maintain and click the Maintain button.
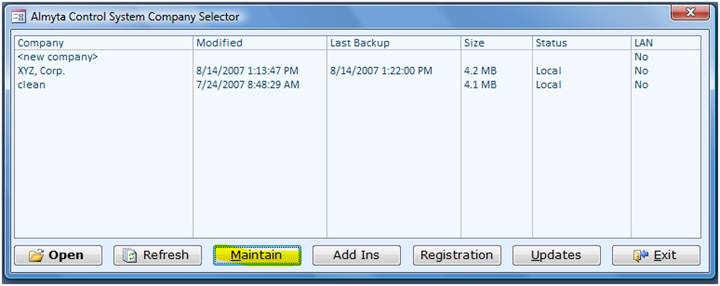
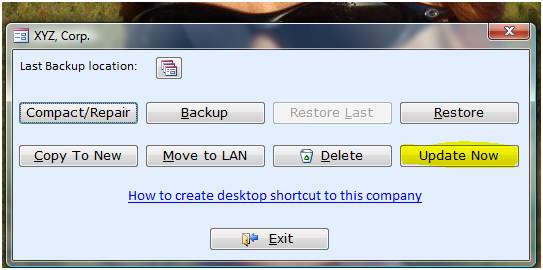
The Maintenance screen pops up.
This screen supports the following function:
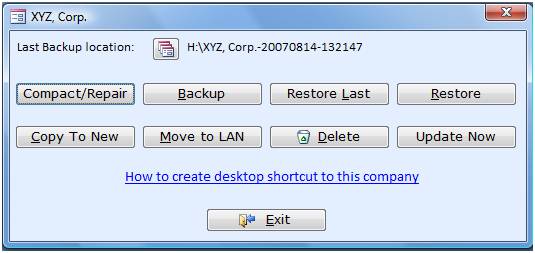
- The Compact/Repair reorganizes the data in the files in the most efficient way, shrinks files, and makes data fixes if needed. In a multi user environment, all users must close the company. Almyta Systems recommends running this function on a weekly basis. For SQL server based companies, only application files are affected. The SQL data files are not compacted.
- The Backup creates a copy of the data file. Back up companies as frequent as you can. This function is not available for SQL server based companies. Set up the backups on the SQL server. To back up MS Access data automatically, open a company, go to the menu System tab, Information and Lists group, Files in Use. The second reference (Data) is the file to backup. Add this file to any backup software. Latest Windows come with a standard backup utility if you do not have third party backup software.
- The Restore Last replaces current database with the last backup copy. This function is not available for SQL server based companies.
- The Restore allows a selection of the backup copy. This function is not available for SQL server based companies.
- The Copy to New copies a company into a new one. This function is useful for renaming or making end-of-month, end-of-year snapshots of the companies. This function is not available for SQL server based companies.
- The Move to LAN moves a local company to the network and makes it
available for other software users. Click the button, select a network
location (V:\ACS in the example), and click the OK. This function is not
available for SQL server based companies.
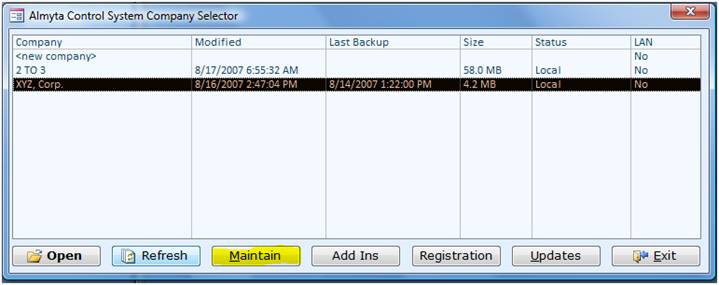
- The Delete removes a local company completely from disk (type YES in all capitals on the next screen). It removes only a link to the networked company leaving the data files in the original location on the network unchanged. This function is not available for SQL server based companies.
- The Update Now replaces the application but leaves the Company data untouched. This function can be used in case when Compact and Repair cannot fix problems. This function can be used with no restrictions for single and multi user installations.
In addition, you can create a desktop shortcut to a company. Click the hyperlink “How to create desktop shortcut to this company”, to find out how to do it.
Sharing Your Local
Company with Other Users. Networked
Installation.
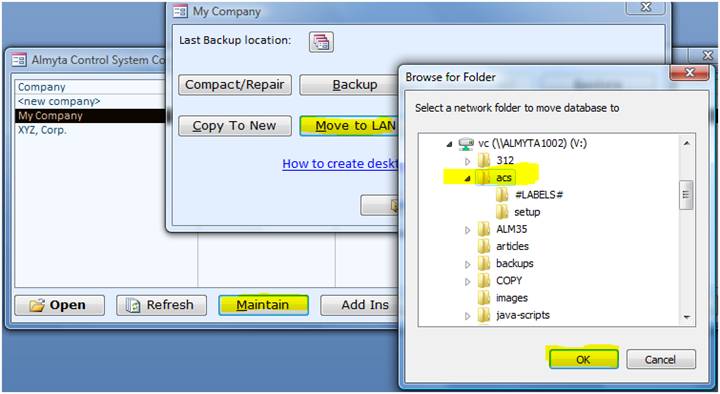
In Almyta Company Selector, choose a local company that you want to share. Click the Maintain button.
On the next screen, click the Move to LAN button.
On the next screen, find a server /share/folder where you want your company to live. Click the OK button. In this example, we selected server ALMYTA1002, share MP. Therefore, our XYZ, Corp, will be moved to the physical place \\ALMYTA1002\MP\#XYZ. Corp.#\.
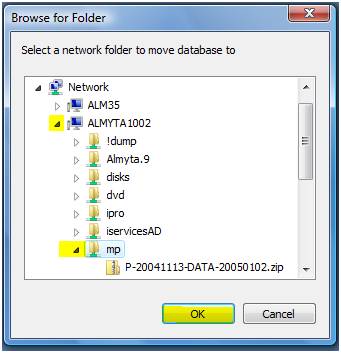
You can also move your company to a mapped networked drive. In the example, we selected V:\ACS. Therefore, our XYZ, Corp, will be moved to the logical place V:\ACS\#XYZ. Corp.#\. When you use a mapped drive (V:), all users who will access this company must have V: drive mapped on their PCs.

Connecting to a Shared Company
In Almyta Company Selector, choose the <new company> and click the Open button.
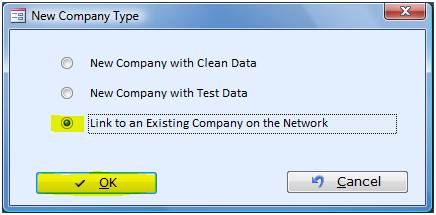
On the next screen,
choose the Link to an Existing Company on the Network and click the OK button.
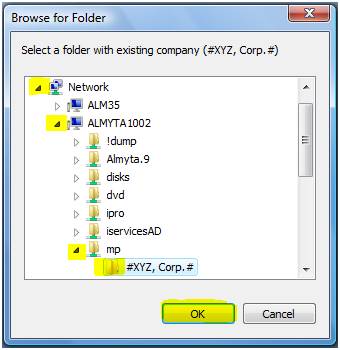
Browse for a network
folder where the shared company is. Select the folder #[Company
Name]# and click the OK button. In the example, we selected \\ALMYTA1002\MP\#XYZ,
Corp.#.
Finding the Data File’s Location
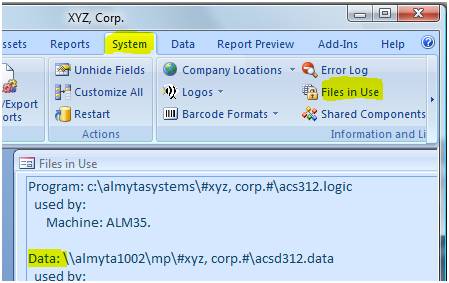
Go to the System tab menu, Information and Lists group, Files in Use. The data file is a second reference on the Files in Use screen.
SQL
Server Installation
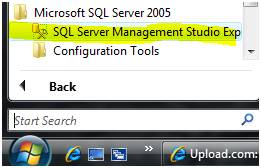
1. Start Microsoft SQL Server 2005
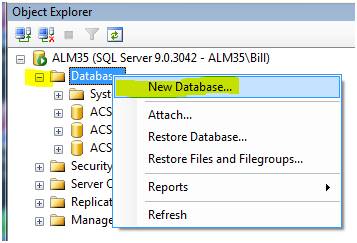
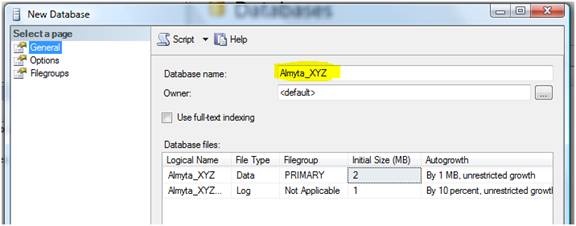
2. Go to the Object Explorer (choose it from the View menu if you don’t see it), right-click on the Databases, and select New Database
3. Name your database like Almyta-[Your Company Name]. Click the OK button
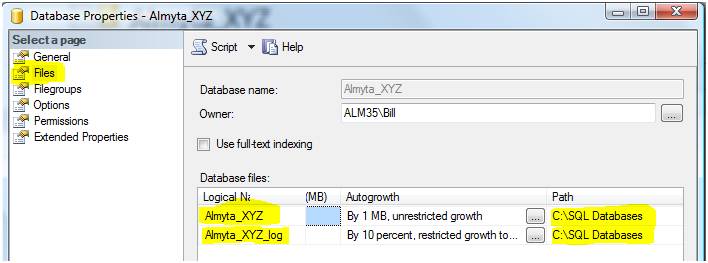
4. After the database is created, right-click it and select Properties from the Popup menu. Switch to the Files page on the left. Make a note of the database file names and their location on disk (path).
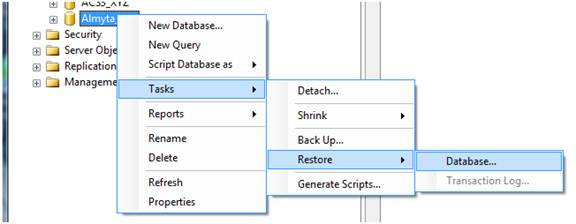
5. Right-click newly created database and select Tasks/Restore/Database.
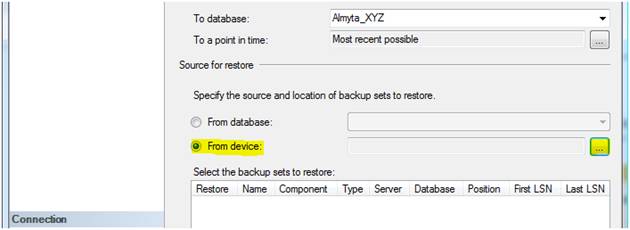
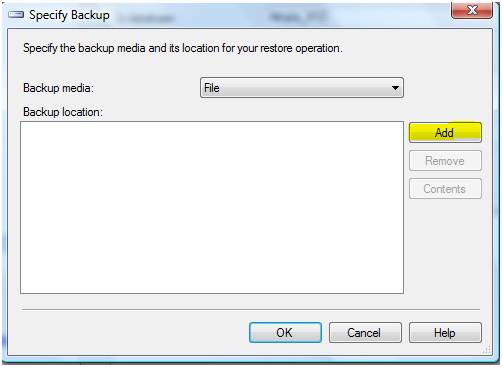
6. Select “From Device” and click the Multi-dot button to the right.
7. On the next screen, click Add.
8. Browse to the Almyta data structure file and double-click it. On Almyta CD the file can be found in MSSQL folder. The file name is acs3-2005by2005.bak
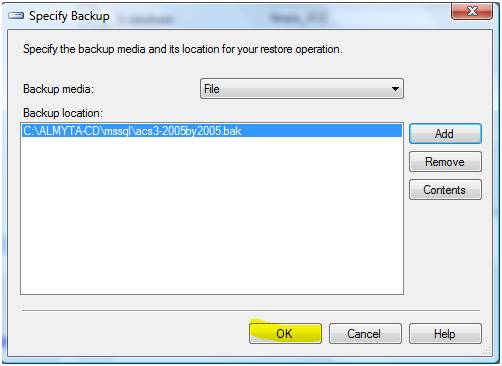
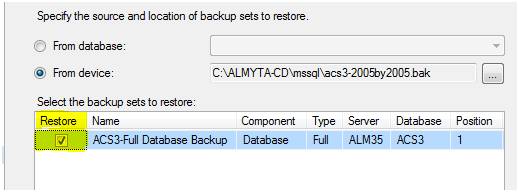
9. When back on the main Restore screen turn on the Restore switch for the dataset.
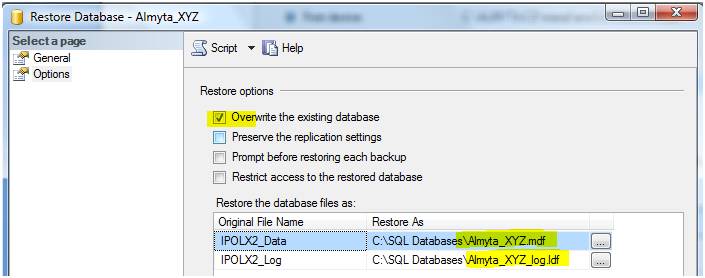
10. Switch to the Options page, and select Overwrite the existing database. Then for each file, click the multi-dot button, scroll and select the file noted in step 4 above.
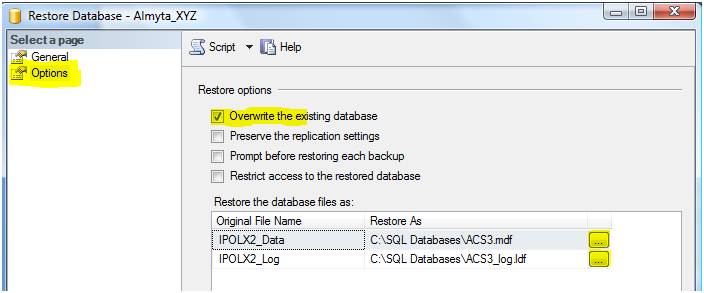
11. Based on the file names in step 4, the resulting screen should look like this
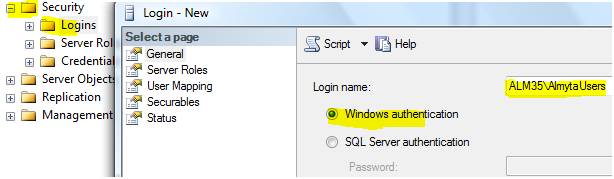
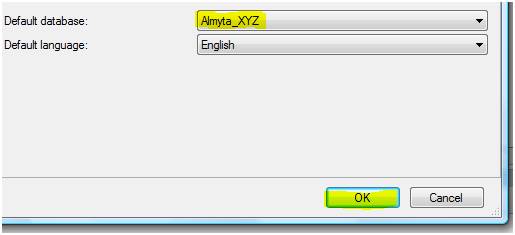
12 If you ever need to add users to the SQL Server, create a user group in Windows Active Directory or workgroup. Call it AlmytaUsers for instance. Add users to it. Add the group to the SQL Server security. Specify the default database to be your newly created Almyta database. You can use any other available way to maintain your security. However, we find this one to be the easiest.
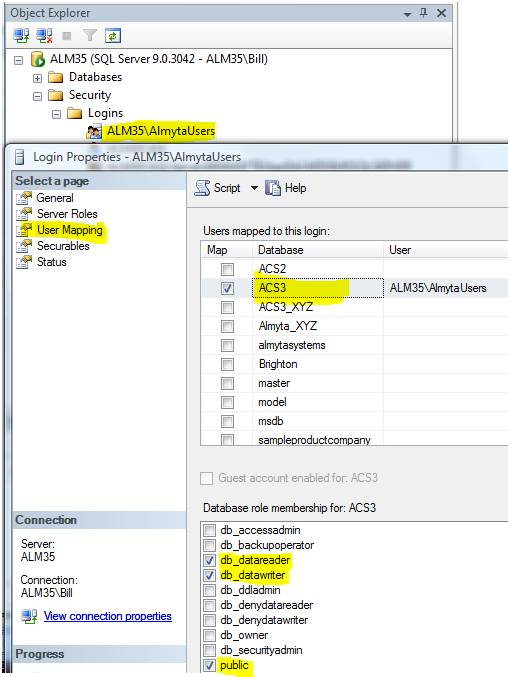
13. You may also need to assign the datareader/datawriter permissions to to group.
Client side (each other
PC)
1. Install Almyta Control System.
2. Copy C:\AlmytaSystems\#Yuor Company# (c:\almytasystems\#almyta xyz sql# in
example)from first PC to each next
Client side (one time setup)
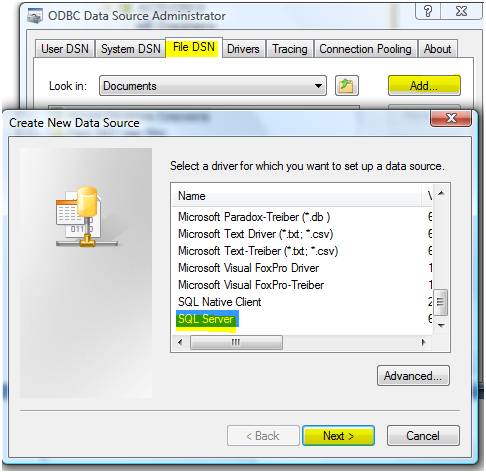
1. Creating Data Source. In the Windows Control Panel, go to the Administrative Tools, Data Sources ODBC and add a new file data source name (DSN). The name of the source is not important but we recommend using descriptive name.
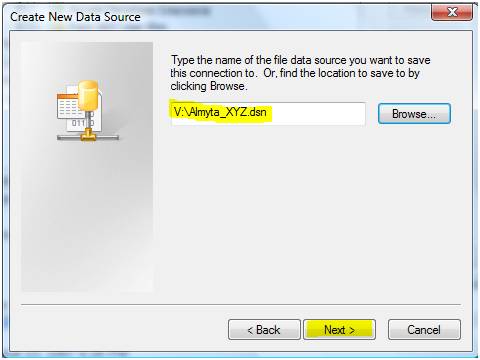
On the next screen, specify a DSN file name and place it somewhere on the network.
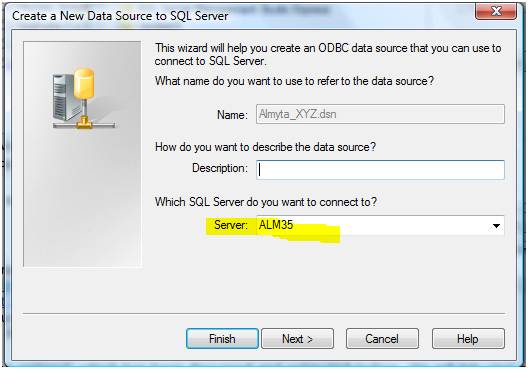
Select your server
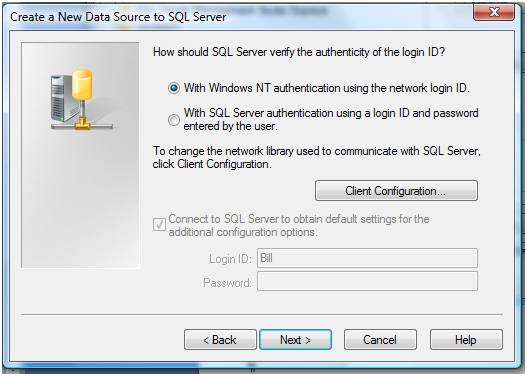
Select Windows or SQL authentication
Select your database
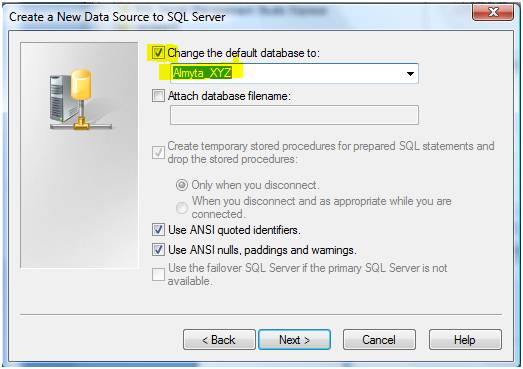
On the next screens, accept all default on the next screens. Test your connection and click OK to save it.
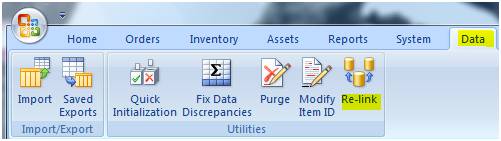
2. Open Almyta Control Company Selector. Create a new company and open it. Go to the Data menu tab, Re-Link.
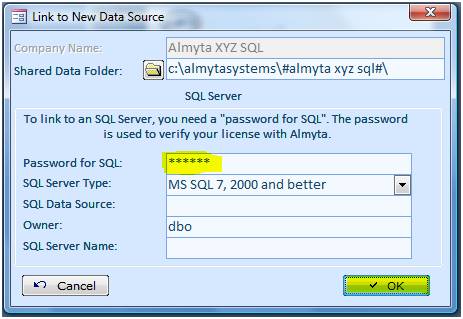
Specify password for SQL and click the OK. This password comes with SQL license from your software vendor.
 \
\
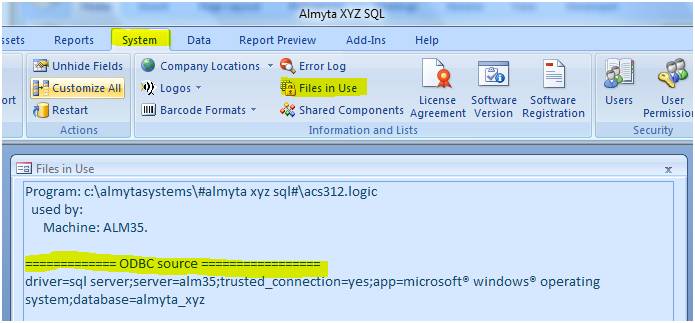
Browse to find the DSN file saved in the step above. After data source is changed, verify it by going to System menu tab, Files in Use. Your data source will show the SQK Server.
Client side (each other PC)
1. Install Almyta Control System.
2. Copy C:\AlmytaSystems\#Your Company# folder (c:\almytasystems\#almyta xyz
sql# in example) from the first PC to each next.
Installing Add-Ins
Installing the Add-ins
under Windows XP
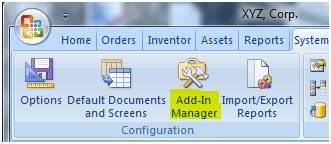
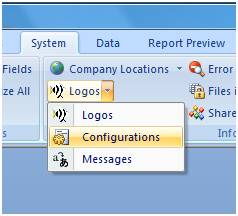
Open your company and go to the menu: System tab, Configuration group, Add-in Manager.
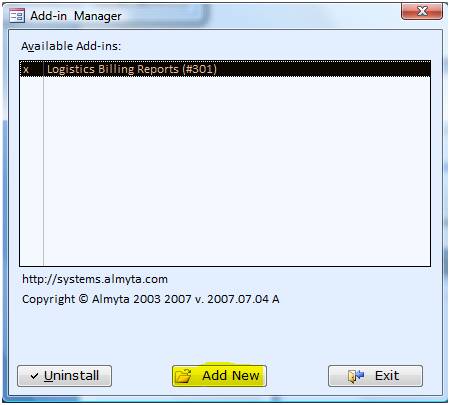
On the Add-In Manager screen, click the Add New button. Browse to a folder where you download the add-in, select the file and click the Open button.
Installing the
Add-ins under Windows Vista
To protect your computer, Windows Vista has a different security policy. Because of the obstacles, you need to create a new shortcut to Almyta Company Selector and start the Company Selector using this new shortcut:
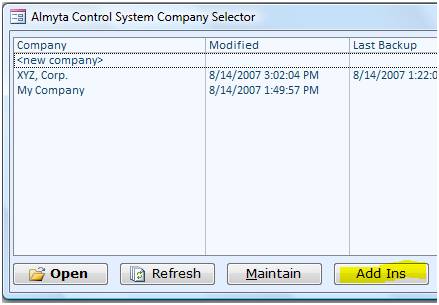
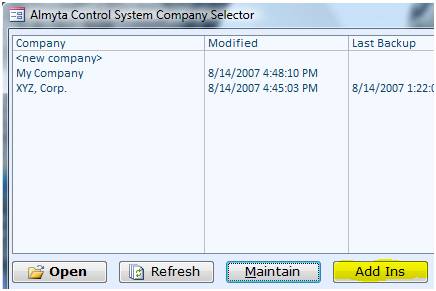
1. In Almyta Company Selector, click the Add-Ins button
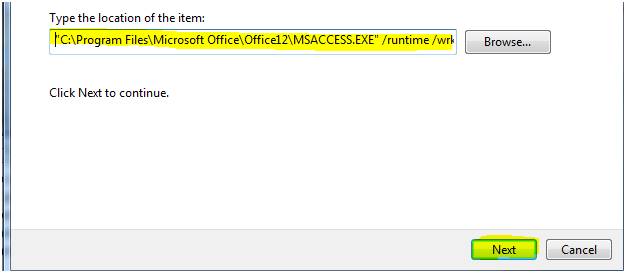
2. Click Yes to the Popup message, and on the next screen, press Ctrl+C to copy
the highlighted text into the clipboard
3. Right-click the Windows Desktop and select New/ Shortcut from the popup menu.
4 Paste the content of the clipboard into the Location of the Item and click the next button.
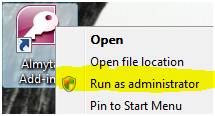
5. On the next screen, change MSACCESS.EXE name to the Almyta Add-ins and click the Finish button.
You can move the icon to any place on your computer if you don’t want to pollute your desktop. When you need to istall or uninstall your add-ins, right-click on the Almyta Add-Ins icon nad select Run as Administrator.
When Almyta Company selector started, click the Add-Ins. Use the Add-In Manager to install the add-ins the same way as you do it in Windows XP.
Substituting Standard Forms with Custom Add-ins
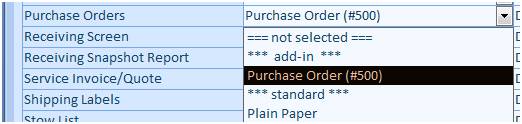
The example below shows how to install and select a custom purchase order print out for My Company.
1. Start Almyta as Administrator or start it as is on XP. Click the Add-Ins button.
2. Click the Add New button.
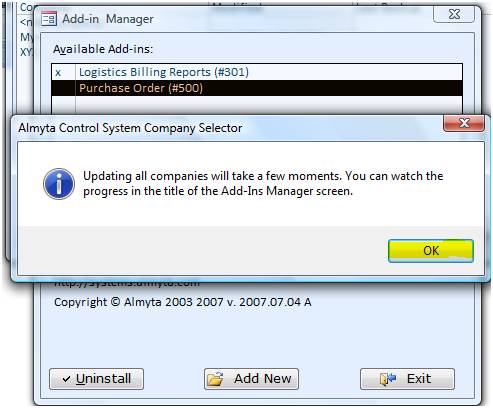
3. Browse to the place where you hold the add-in and double-click it. Click OK to the warning.
4. Click Exit to close the Add-In Manager and open My Company. Go to the menu System tab and click on the Default Documents button.
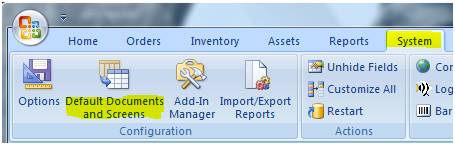
5. Select just installed Purchase Order #500 for the Purchase Orders document type.
Renaming, Hiding, Showing fields on the Form-Like screens
Do not use this technique on the spreadsheet like screens (screens with rows and columns). See “Changing column names on the spreadsheet like screens” chapter below.
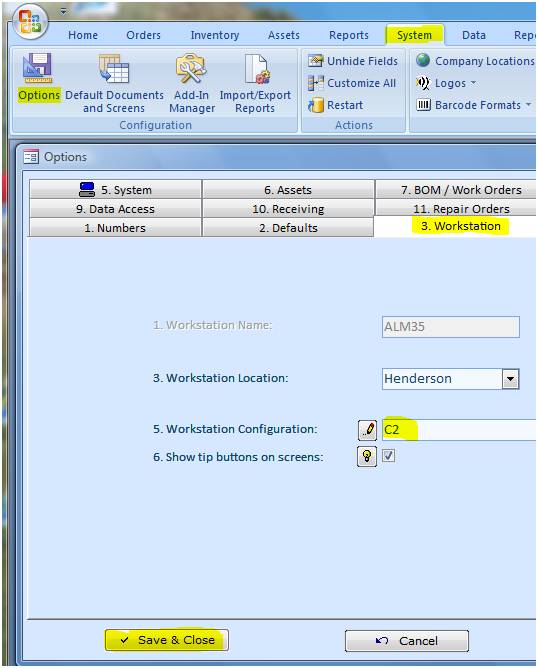
1. Go to the System menu tab, Options screen. Switch to the 3 Workstation tab. Select custom configuration in 5 Workstation Configuration dropdown list. Do not select the original configuration. It is not customizable. You can always switch to the original configuration later to restore screens’ and reports’ standard state. Save the change.
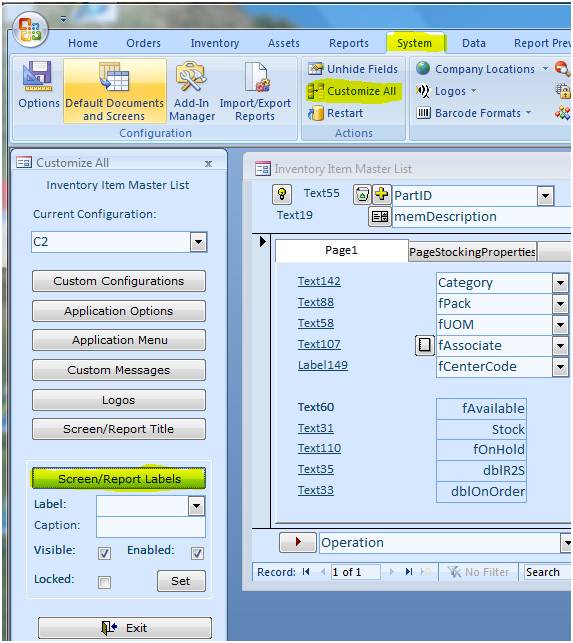
2. Close all opened screens and reports. To quickly do so, select the Restart in the System menu tab. Open a screen or report to be customized. Select Customize All from the System menu tab. Click the Screen/Report Title button.
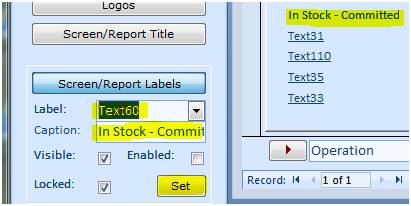
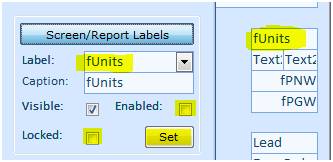
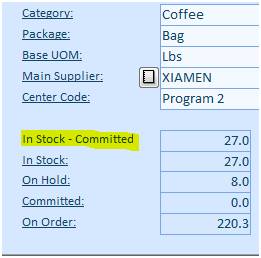
3. To rename a label, select its name in the Label dropdown list, input a new name in the Caption, and click the Set button. In the example below, we have renamed the Available field to explicitly spell out what it stands for.
4. To hide a field, select its name in the Label, check Visible off, and click Set.

5. To lock a field for editing, select its name in the Label, uncheck Enabled, and click Set.
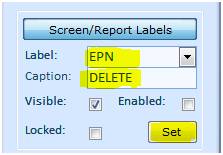
6. To delete a particular customization, select the field name in the Label, type in DELETE in the Caption field, click Set.
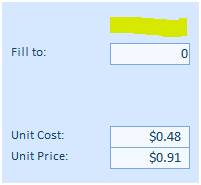
7. To quickly see how your customizations look like, click the Screen/Reports Labels button again. This will reload the current screen or report. These are the resulting excerpts of our customization.
8. If you have too many such fields, consider creating a new configuration and assign it to your workstation.
Changing column names on the spreadsheet like screens
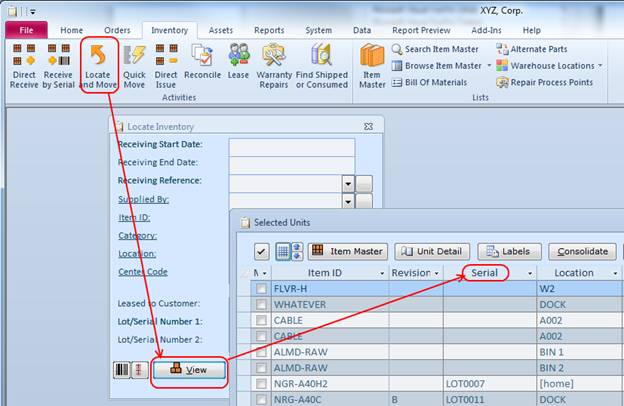
We will show how to rename “Serial” column name to “Batch No” on the Units in Stock screen. Other screens and columns can be changed exactly same way.
1. Open a desired screen.
2. Close the screen.
3. Go to the [C:\AlmytaSystems]\#Company Name#\Screens folder in the Windows Explorer. Click the Down Arrow button to the right of the View Type icon and select the Details from the popup menu. Click the Date Modified column title to sort files in descending order. The file that you need to open will be at the top.

4. Double click the file to open it in the Notepad.
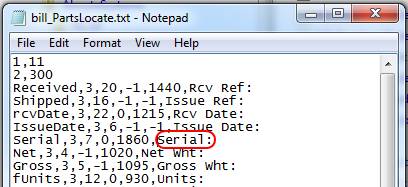
5. Find a row corresponding to the column that you are changing and type in a new column name. The column name is on the right. The field name is on the left. Do not change the field name. Press Ctrl+S to save the file or use File/Save menu.
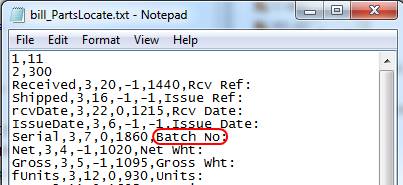
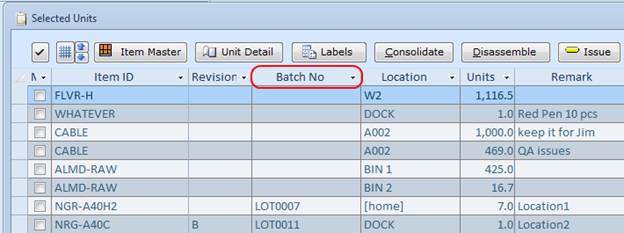
6 Open the screen again. The column name show read “Batch No” now.
Please note, the screen recreates or overwrites the text file when you close it. When modifying the text file, make sure that the screen is closed. If you make a mistake or want to start over, ensure that the screen is closed then delete the text file from disk. Open and close the screen to recreate the text file per the original specifications.
Changing column names on the browse screens and reports
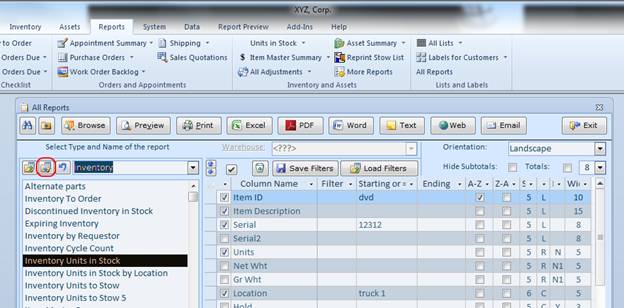
We will show how to rename “Serial” column name to “Batch No” on the Units in Stock report. Other reports found on the All Reports screen can be changed exactly same way.
1. Find Units in Stock report on the All Reports screen. Select the report. Press Shift key and, while holding it down, right-click the Export current Report Definition button.
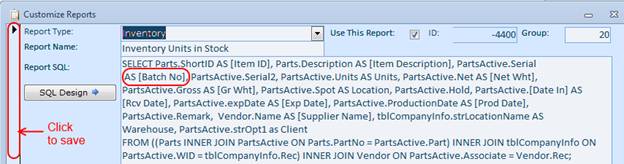
2. The Customize Report screen will appear on the background. Move aside the All Reports screen until you see the Customize Report window and click on it to bring it to the foreground.
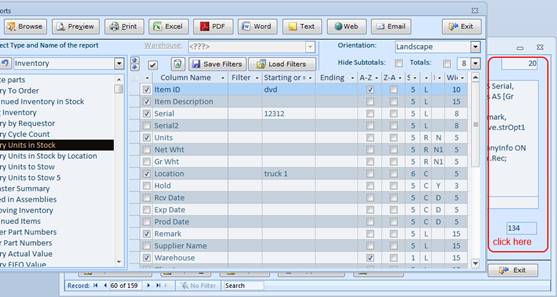
3. Find a field with name Serial.

4. Change it to [Batch
No] (in square brackets). The format is [Table Name].[Field
Name] AS [Column Name]. Change only {Column Name] portion of it. If you see
wording without AS [Column Name] then the column name matches the field name.
In example below, you can see PartsActive.Serial2. To change column name from
Serial2 to “IMEI number”, replace see PartsActive.Serial2 with
PartsActive.Serial2 AS [IMEI number]. Click vertical bar on the left to save
the changes.
5. Switch back to the All Reports screen. The filters will be deleted.
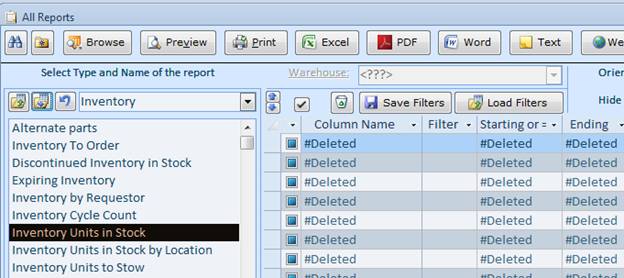
6. Click on any other report and then click back on the report that you are modifying. The filters will be recreated and you will see the changes right away.

Translating, hiding, and editing menus
The menus can be modified per a workstation. Any upgrade will reset menu customization. Make sure to save your customization in a separate file. This file can be saved in any place including a network share. It can then be imported into other workstations.
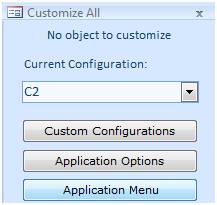
1. Click the Application Menu on the Customize All screen
2. Use Export button to save your current menu version to a file.
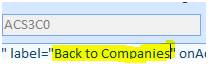
3. To customize the Return to Company Selector, find the label in the menu definition.
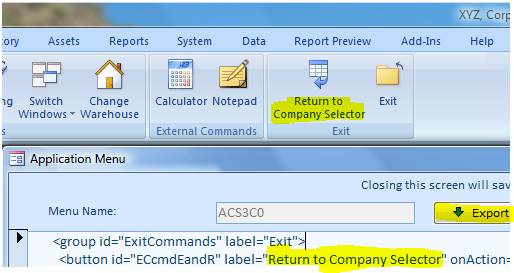
and change it.
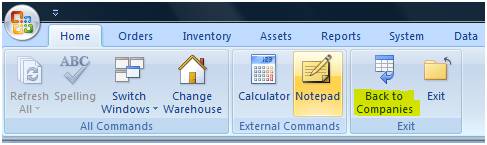
4. Close and reopen Almyta. This is a resulting screen of the action.
If you are satisfied with your change, go back to the Customize All, click Application Menu, click Export and Save.
5. If your menu does not load, use the Update Now button in the Company Selector screen. Import your latest good menu back.
Mobile Devices
For the networked mobile devices, you need to have Windows Server 2003 or later with RDP (Terminal Server). You will also need to install Almyta Control Software on the server. Open Almyta Company Selector on a server using desktop PC or console, click the Maintain button, click How to create desktop shortcut link. Copy a shortcut target and paste in in a text editor window (Notepad).
To configure a mobile device, create Windows login for each device in your domain or server user list. Make each login an RDP accessible and paste shortcut target from the notepad into user startup application for RDP. This will assure that each device will open ACS company defined in the shortcut. In order for the mobile device to open Mobile screen on startup, create a text file on the server (C:\AlmtaSystems\MobileUserList.txt). Open file with a Notepad and list all mobile users one per row:
RDP-User1
RDP-User2
RDP-User3
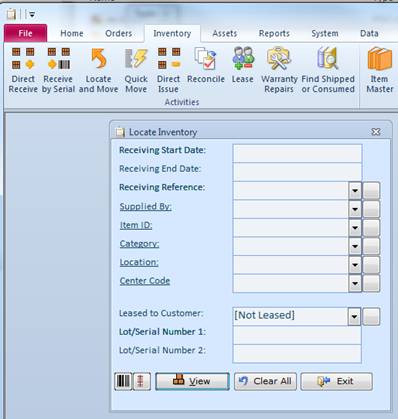
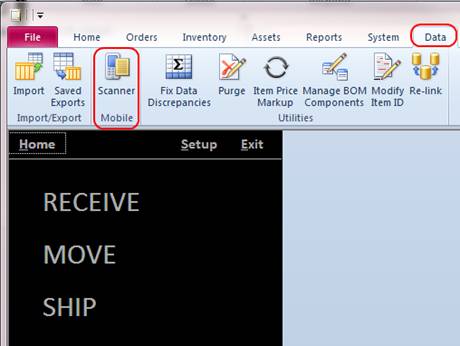
To access the Mobile Scanner screen from your desktop computer, follow to the Data menu tab, Scanner screen. The screen has three main functions: Receive, Move, and Ship.
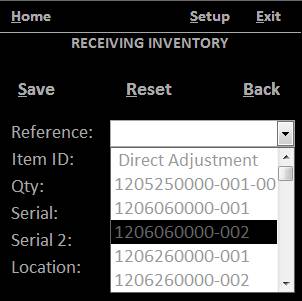
Mobile Receive
Select the RECEIVE menu on the main screen. Select a value in the receiving Reference. The reference can be “Direct Adjustment”, purchase order or warehouse appointment. If reference is a PO or an appointment, the total units and units to receive numbers will appear the screen bottom.
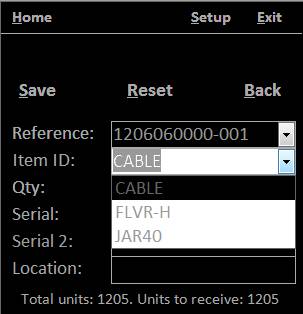
Select a value the Item ID. If reference is a PO or an appointment, the Qty field will be automatically populated with the outstanding units. Change the quantity to an actual value, or to accept the number, press the Enter key or right arrow key.
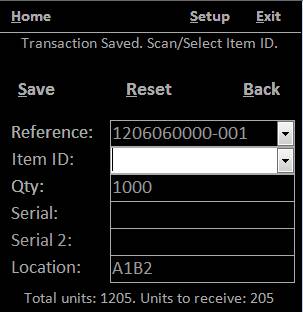
Scan or input serial number and the location if needed.

Press Save (Enter key) to save transaction. The cursor will jump to the Item ID field ready for the next item.
To close a PO, find it in the
PO Order Detail and click close button at the screen bottom.
Mobile Move
From the main menu, select the Move function. Scan Serial number. If unit is found, the cursor will jump to the Qty field. Change the quantity if needed or press Enter key/Right Arrow to go to the Location field.
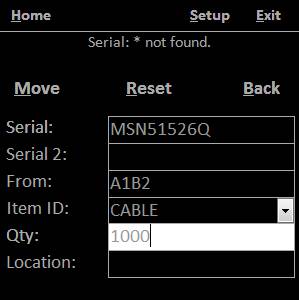
Scan or input the destination Location or serial number.
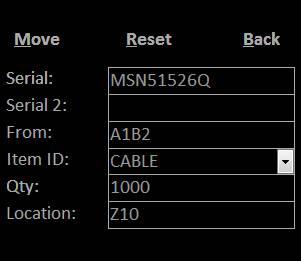
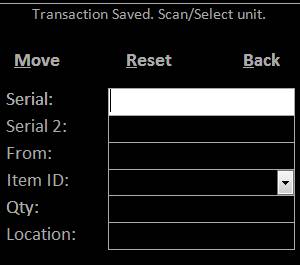
The cursor will jump to the Move field if the unit is found. Press Enter key. The unit will be moved. The “Transaction Saved” message will appear at the top. The screen will reset ready for next transaction.
Mobile Ship
Select SHIP from the main menu.
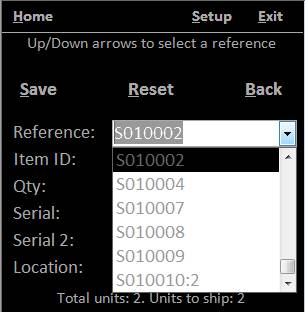
Select a shipping order or
Drect Adjustemnt
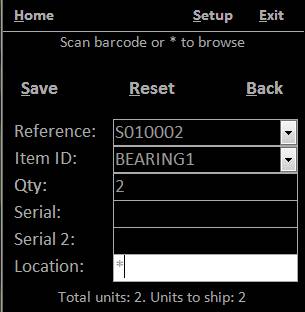
Scan a serial number or
warehouse location. Alternatively, type in * in the location or serial number
field if label is missing or damaged. In this case, select a value from the
list.

When unit is identified, the cursor jumps to the Save field. Press the Enter key.
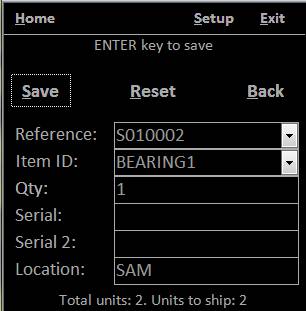
Continue scanning units until
you finished with the shipping order. To ship the orders picked with a scanner,
use a regular desktop PC at your shipping office. Go to the Orders, Order
Fulfillment menu, select Picked with Mobile Device, and click Ship and Print.
To configure how many copies of each document to output, click Tools button on
the right.
